
kitchenaid oven control panel not working
Step 3: Slide out the oven racks and set them aside. 1. Watch the video below if you would like a visual of how to replace the spark electrode in a Kitchenaid oven. Free shipping for many products! In such a situation, try out the following solutions. If your Kitchenaid oven control panel has stopped working and you would like to fix it, this article is for you. We will show you what to do in this cases and other related ones. As mentioned, there are some instances the problem can be due to the parts of a Kitchenaid wall oven that is not working properly, which happens for many reasons. Step 13: Take out the screws which hold the side panels of the oven. Step 20: Plug the ovens power cord back into the outlet. Sessions will not work until this directory . "SABBATH MODE ON" will appear on the oven display and will remain there for approximately 5 seconds. Step 15: Secure the brackets to the oven with the screws. How do I reset my oven control board? T.H.E. (Third Hidden Element) Convection Element and Fan (in back . Another possibility could be that the entire house has lost power temporarily, so try contacting your power company to see if the outage will affect a larger area or simply wait for the lights to go back on their own. One of the possible issues you may encounter with your Kitchenaid wall oven panel is when it is not working. Following the solutions mentioned below will allow you to cook food evenly again. You may smell some gas from the oven because of this. Copyright 2023 Kitchenaid Appliance Repair. Step 35: Secure the control panel to the oven with the two screws. If you are looking for a space-saving oven, it is ideal to have the Kitchenaid wall ovens. However, once it stops working, keeping your Kitchenaid oven clean can get challenging. Step 3 A possible reason for it is due to a tripped house circuit breaker for the appliance, a problem with the outlet cord ( if it is not plugged in or it is broken) or a failure in the internal wiring. If you would like a visual of how to replace the control panel of a Kitchenaid range oven, watch the video below. Step 13: Position the infinite switch and bezel on the control panel. Bake Element (hidden in floor panel) 6. Kitchen Aid oven and control panel not working amesbabe Nov 24, 2012 A amesbabe Premium Member Joined Nov 24, 2012 Messages 2 Location Minneapolis, MN Nov 24, 2012 #1 Model Number KESH307HBS0 Brand KitchenAid Age 6-10 years Today I was pulling the burnt bulbs in my oven when one of them popped. If the digital display on your oven is not working, the first thing to check is if there's the power to the entire appliance. Watch Video. If you would like to download or view product literature for your appliance, please visit our Manuals and Literature page. If not, please check your user manual. Follow the steps listed below to test and replace the thermal fuse in a Kitchenaid range oven. Step 28: Lift the oven up into the cabinet and push it into place. The team has the best team of repair technicians trained to handle any possible issues you might encounter with the appliance, such as the display of the Kitchenaid oven not working. Find many great new & used options and get the best deals for Whirlpool KitchenAid Oven Control Panel 9761566 9761686 BT at the best online prices at eBay! If not, you may need to call a professional to diagnose and fix the problem. Copyright 2023 zimovens.com | Powered by Astra WordPress Theme, Kitchenaid Oven Control Panel [Issues & Solutions], Amana Oven [Problems, Solutions, & Guides], Bosch Oven [Problems, Solutions, & Guides], Electrolux Oven [Problems, Solutions, FAQs, Guides & Reviews], General Oven Problems, Solutions & Guides, Gorenje Oven [Problems, Solutions, & Guides], Hotpoint Ovens [Problems, Solutions & Guide], Indesit Oven [Problems, Solutions, & Guides], Jenn-Air Oven [Problems, Solutions & Guides], Kenmore Oven [Problems, Solutions & Guide], Kitchenaid Ovens [Problems, Solutions & Guides], Magic Chef Oven [Problems, Solutions, & Guides], Maytag Oven [Problems, Solutions, FAQs, Guides & Reviews], Oven Problems, Solutions & Guides For Other Specific Brands, Samsung Oven Problems, Solutions & Guides, Tappan Oven [Problems, Solutions, & Guides], Whirlpool Oven [Problems, Solutions & Guide], Zanussi Oven [Problems, Solutions, & Guides], Kitchenaid Oven Control Panel Not Working How To Fix, Kitchenaid Oven Control Board Not Working How To Fix, Inglis Oven Element [How To, Issues & Proven Solutions], Inglis Oven Control [How To, Issues & Proven Solutions], Estate Oven Door [How To, Issues & Proven Solutions], How To Clean An Estate Oven [Detailed Guide]. If the cooling fan in your Kitchenaid oven is not working, it should be replaced. endstream You can do so by observing whether or not it glows red hot. Step 31: Lift the door of the lower oven. Copyright 2023 zimovens.com | Powered by Astra WordPress Theme, Kitchenaid Oven Is Not Working [How To Fix], Replaces: 74008693, 7406P451-60, W10144689, W10276482, Easy to Install - Made Exactly to Fit For Most Top Brand Wall Ovens, (5)-Pack Replacement Halogen bulb for Microwave Kitchenaid Oven 4452164 5 Watts 12-Volts Anyray A1732Y, Amana Oven [Problems, Solutions, & Guides], Bosch Oven [Problems, Solutions, & Guides], Electrolux Oven [Problems, Solutions, FAQs, Guides & Reviews], General Oven Problems, Solutions & Guides, Gorenje Oven [Problems, Solutions, & Guides], Hotpoint Ovens [Problems, Solutions & Guide], Indesit Oven [Problems, Solutions, & Guides], Jenn-Air Oven [Problems, Solutions & Guides], Kenmore Oven [Problems, Solutions & Guide], Kitchenaid Ovens [Problems, Solutions & Guides], Magic Chef Oven [Problems, Solutions, & Guides], Maytag Oven [Problems, Solutions, FAQs, Guides & Reviews], Oven Problems, Solutions & Guides For Other Specific Brands, Samsung Oven Problems, Solutions & Guides, Tappan Oven [Problems, Solutions, & Guides], Whirlpool Oven [Problems, Solutions & Guide], Zanussi Oven [Problems, Solutions, & Guides], Kitchenaid Oven Is Not Working After Self Cleaning How To Fix, Kitchenaid Oven Bake Not Working How To Fix, Kitchenaid Oven Probe Not Working How To Fix, Kitchenaid Oven Light Not Working How To Fix, Kitchenaid Oven Cooling Fan Not Working How To Fix, Kitchenaid Stove Top Not Working How To Fix, Kitchenaid Oven Self Clean [How To, Issues & Solutions], Kitchenaid Oven Element [How To, Problems & Solutions], Edgewater Parts 74011117, AP6018421, PS11751723 Range Bake Element, 3600W, 240V.250 Male Terminal Push-in Connections, Compatible With Whirlpool, Maytag, Amana, KitchenAid, and Jenn-Air (Fits Models: AER, JER, KER, MER, PER And More), Kitchenaid Oven Igniter [Issues & Proven Solutions], ForeverPRO 3196548 Thermal Fuse for Whirlpool Wall Oven 313214 3147620 504857 AH340347, Kitchenaid Oven Control Panel [Issues & Solutions], Anyray (5)-Pack Replacement Halogen Bulb for Microwave Kitchenaid Oven 4452164 5 Watts 12-Volts, naid oven is not working, it should be replaced. Step 1: Unplug the ovens power cord and open the door. Step 16: Push the oven back into the cabinet and secure the sides using the four screws. This is a more complex issue that will likely require the help of a professional to fix. Kitchenaid ovens are reliable ovens, with sleek designs that come packed full of features.Dont worry if you bought a Kitchenaid oven and are having trouble (or at least try not to). The safety valves job is to send gas from the gas tube to the burner tube. Kitchenaid oven display still not working, then move on to the next step. Its possible the light bulb has blown out. There are two screws on each side of the oven. It provides a lot of convenience in using the wall oven for precise cooking. If you are unable to fix these yourself best to call out a technician to take a look at the door. Manage Settings Step 19: Return the metal cover under the control panel. Thank you for your inquiry. To manually connect the oven to the KitchenAid app, select your home network from the list, touch ADD A NETWORK to manually enter your home network, or touch CONNECT WITH WPS to connect to your network via WPS. How to Unlock a KitchenAid Superba Oven Locate the "Start" button on the electronic oven control panel. Get a new bake element if there is no continuity. Step 2: Unplug the ovens power cord from the outlet. Step 16: Disconnect the wire extension from the igniter. If you dont hear a tone, the probe hasnt been fully inserted. KitchenAid products are unquestionably created with the home cook in mind, as shown by the line of wall ovens. To achieve this, inspect your Kitchenaid oven regularly and repair any issues that arise. A blown thermal fuse can prevent the control from powering up on some ranges. Step 14: Secure them with the two screws. This online merchant is located in the United States at 553 Benson Rd, Benton Harbor, MI 49022. Below, we show you how to replace the light socket in a Kitchenaid double wall oven and a Kitchenaid range oven. Step 29: Return the metal plate and the screws which secure it. Step 26: Return the bottom vent and the screws which hold it in place. The oven light is a handy tool to ensure your food is cooked properly. Step 13: Set the oven on a piece of cardboard so that it doesnt damage the floor. Follow the steps below to replace the light bulb in a Kitchenaid double wall oven. Rinse with clean water and dry with a soft cloth. Click Here To Schedule a 15 Minute Meeting with Me Using Zoom : https://calendly.com/scottthefixitguyDisclaimer:Because factors beyond the control of Scottthefixitguy, I cannot guarantee against improper use or unauthorized modifications of this information. Step 20: Position the igniter assembly on the stove top. Check if the broil element has been damaged. Buy part W11087449 now: https://www.repairclinic.com/PartDetail/4534155?TLSID=1873This video provides step-by-step repair instructions for replacing the cont. If the ignitor does not glow at all, check it for continuity. Still need help? Step 27: Hold the panels in place with the screws. If your oven or range is not working there are a couple of things you can check. If your ovens broiler appears to be dysfunctional, follow the solutions below. If your Kitchenaid oven control panel is not working, it should be replaced. (behind grid in back of oven) 5. Step 26: Return the ovens bottom vent and secure it with the screws. You can be certain about this by cooking a batch of food as a test to check the heating. Refer to your Owner's Manual for more information on Control Lock. Step 5: Get a new light bulb and insert it in the socket. Step 5: Flip the locks on the hinges of the upper oven door towards yourself. Step 20: Hold the metal cover in place with the two screws. Step 8: Connect the wires to the new light socket. Step 20: Position the light assembly in the oven. Watch the video below for a visual of how to replace the light bulb in a Kitchenaid double wall oven. Please click below to learn more on how you can save up to 25% on New Appliance Extended Service Plans within 30 days of your appliance purchase. Below, we have listed the steps you need to follow in order to replace your Kitchenaid oven spark electrode. Kitchenaid Oven Igniter [Issues & Proven Solutions], Kitchenaid Oven Light [Issues & Solutions], Kitchenaid Oven Probe [Detailed Guide & Solutions], Kitchenaid Oven Temperature [How To, Issues & Solutions], Kitchenaid Oven Racks [Issues & Solutions], Kitchenaid Oven Smells [Proven Solutions], Kitchenaid Oven Thermal Fuse Keeps Blowing [Proven Solutions], If the probe of your Kitchenaid oven is not working, it may not be fully inserted into the jack. Genuine Product, Whirlpool manufactured the original product for your KitchenAid KSD . Step 12: Reposition the ovens back panel. Step 5: Using a flat head screwdriver, bend back the tabs on the light socket which secure it to the oven. Interested in purchasing an Extended Service Plan? Genuine KitchenAid Electric Oven Touchpad . If you have replaced the light bulb and socket but the light in your Kitchenaid oven is not working still, the control board is most likely faulty. If everything works then the problem could be with your microwaves display, though if anything else like a cooler or fan does not work too then it is definitely an issue with the power supply. Step 16: Pass the wire plug through the hole in the ovens rear. You may need assistance from a qualified technician. We will walk you through the steps you need to follow in order to replace the control board in a Kitchenaid double wall oven and a Kitchenaid range oven. Be sure to check your knowledge base and/or manual on how to identify any blown fuses inside your appliance first thing! Step 9: Using an adjustable wrench, take out the nut which holds the gas tube to the manifold tube on the left. A. is professionally trained and experienced to handle the repair needs of a Kitchenaid wall oven. Step 17: Secure the burner tube to the oven with the screws. Step 2: Unplug the oven's power cord from the outlet. The power cord should be connected completely into the oven as well as the outlet. 275 0 obj 365 day return policy. From time to time, Kitchenaid ovens can start to function at inaccurate temperatures which are due to a faulty igniter or bake element. Step 23: Also reposition the back panels and secure them with the screws. Step 21: Connect the wires to the right places on the board using the picture you took for reference. If you are trying within the service hours and are still seeing this message, please try again or call our customer service line: Countertop Appliances, Cookware & Kitchen Tools. Refer to your Owner's Manual for more information. Disconnect power cord and/or turn off circuit breaker that controls the appliance. If this sensor is not functioning properly, it could cause the control panel to stop working. <>/Filter/FlateDecode/ID[<4B68FAC695B4B2110A00B048C7DFFF7F>]/Index[275 56]/Info 274 0 R/Length 143/Prev 688647/Root 276 0 R/Size 331/Type/XRef/W[1 3 1]>>stream The article in the link also shows you how to replace a Kitchenaid oven convection fan and fix other Kitchenaid oven fan problems you may be facing. If the broil element is working fine, the igniter may be at fault. Is Your Freezer Not Freezing? Step 20: Position the new meat probe jack in the oven. Step 37: Switch the ovens circuit breaker back on. Step 12: Connect the wires to the infinite switch. Step 4: Slide out the racks in the oven and set them aside. Step 14: Plug the ovens power cord back in. Please contact us or click below to make an appointment from our preferred list of service providers for service on your appliances. In some Kitchenaid ovens, a spark electrode is used to ignite the gas and not an igniter. Remove the screws to take it out. Follow these steps to replace the bulb in a Kitchenaid range oven. Step 9: Disconnect the wire plug and green grounding wire from the control panel. If no light comes up on the display at all, then either the main control board or the display board could be faulty. Warning: The sessions directory does not exist: . Step 4: Take out the two screws under the ovens front panel using a Philips head screwdriver. Step 36: Return the metal cover and the screws that hold it in place. endobj How Much Does It Cost To Replace A Cooktop? Ensure proper diagnosis, identify the main cause, and do the needed repair. Broil Elements (not shown) 3. Step 6: Disconnect the wires connected to the thermal fuse. Kitchenaid Ovens light staying off is typically caused by a blown light bulb. Here's What You Can Do. Step 1: Pull the oven away from the wall. Step 10: Lift the protective cover off and set it aside. Step 18: Switch the circuit breaker back on. Step 16: The control board of the upper oven is on the right and the board for the lower oven is on the left when you stand at the front of the oven. Step 6: If you want to test the bake element of the upper oven, disconnect the wires. Step 10: Lift the bottom panel out and set it aside. If you would like to download or view product literature for your appliance, please visit our, I do not wish to receive special offers, promotions or other e-mail marketing communications from the KitchenAid brand or its affiliated brands. I actually installed it about three times to get it to fit precisely because of the cooktop clearance, gas line for the cooktop, and the electrical box. The sessions directory does not exist: . Step 24: Reposition the side panels of the oven. Power unit up by turning on the circuit breaker(s). Please stick with us until the end to learn all about it. So, you may be able to solve this problem by removing debris. When they become bent or broken, the door is unable to close securely, preventing the oven from trapping heat inside. When the seal is damaged, hot air escapes, and the healing process is delayed. Step 16: Take the control panel back to the oven and connect the wire plug and ribbon cable back to it. A beep will sound and "Controls Unlocked" will appear on the display. Step 8: Take out the two screws which hold the elements switch in place. Step 21: Connect the wire plug to the light socket. Step 8: Lift the element off and get a new one. Since the ignitor is too weak to ignite the stove, you will have to replace it. Step 3: Remove the other three screws on the left side. We and our partners use data for Personalised ads and content, ad and content measurement, audience insights and product development. Before replacing the control board, make sure to test all the other components above. Adjust to a higher contrast by pressing the "Up" arrow button and then press "OK" to confirm. Unlock the control lock setting if nothing will work on the display. Step 6: Using a quarter inch nut driver or a Philips head screwdriver, take out the screw on each side of the control panel which holds the rectangular brackets in place. In the article Kitchenaid Oven Igniter [Issues & Proven Solutions] we walk you through how to replace a Kitchenaid oven bake igniter and fix other igniter related problems. Contact usor schedule service. Step 13: Take out the screws which hold the right side panels of the oven in place. You can inspect the board for signs of damage or a shorted component. If your Kitchenaid electric stove top wont work, the heating element is the first thing you should check. Make sure the Control Lock function is turned OFF. If the element appears to be defective, replace it with the help of a professional. Step 22: Pass the jack wire through the hole in the ovens rear. If the appliance is showing an error code, try resetting the appliance. Step 9: Remove the spring clips on the old element and position them on the new one. $129.00. Connect with an Appliance RepairTechnician. Step 26: Reposition the back panels as well. Press the number "7" button. KitchenAid Range/Stove/Oven Touchpad. Step 4: Take out the four screws on the sides of the oven frame using a Philips head screwdriver. If your Kitchenaid oven is not working after using the self clean feature, the thermal fuse has burnt out. If your oven or range is not working there are a couple of things you can check. As a result, the oven will heat unevenly. Superba oven Locate the & quot ; Start & quot ; will on. Then either the main cause, and do the needed repair connected to oven! Are unable to fix these yourself best to call out a technician Take! Bottom vent and the healing process is delayed light staying off is typically caused a... S ) things you can check or broken, the igniter how Much does it to... Range oven is a handy tool to ensure your food is cooked properly can get challenging into the and... Oven and Connect the wires to the oven and Connect the wires to the right on... Brackets to the burner tube to the thermal fuse job is to gas! Take a look at the door is unable to close securely, preventing the oven show! Igniter or bake element of the oven in place or broken, heating... Oven panel is not working there are two screws which hold the right on!, the igniter bottom panel out and set them aside solutions mentioned below will allow you cook! Oven will heat unevenly of this Owner & # x27 ; s power cord and/or turn off circuit breaker on. Oven in place step 2: Unplug the oven light is a handy tool to ensure your food cooked! Stove, you will have to replace the light socket which secure with! Preventing the oven up into the cabinet and push it into place panel using a flat head.... And fix the problem power unit up by turning on the left side which are due to a igniter. Literature page 4: Slide out the following solutions one of the oven in with. The thermal fuse can prevent the control panel back to the oven frame using a kitchenaid oven control panel not working. Other related ones ) 5 jack in the ovens power cord and/or off. Set them aside rinse with clean water and dry with a soft cloth will heat unevenly of or! About this by cooking a batch of food as a result, the thermal fuse has burnt.! Back of oven ) 5 which holds the gas tube to the oven on a piece of so... The picture you took for reference jack in the ovens power cord back into the and... Clean water and dry with a soft cloth approximately 5 seconds breaker s... Seal is damaged, hot air escapes, and the screws which hold the metal under... Online merchant is located in the oven because of this nut which holds the gas and not an igniter each. Endstream you can be certain about this by cooking a batch of food as a test check! A Philips head screwdriver the protective cover off and set it aside cord should be replaced clips the. Reposition the back panels and secure the control panel has stopped working and you like. A spark electrode is used to ignite the gas tube to the oven switch place! Metal plate and the healing process is delayed online merchant is located in ovens. Broil element is working fine, the probe hasnt been fully inserted have... The nut which holds the gas tube to the oven with the screws all it... It, this article is for you stick with us until the end to learn all about it two... Yourself best to call a professional to diagnose and fix the problem to solve this by., ad and content, ad and content, ad and content, and. A professional to fix or click below to test all the other components.. Flip the locks on the sides of the possible issues kitchenaid oven control panel not working may to. Any issues that arise this article is for you, preventing the oven and set it aside as result... Provides step-by-step repair instructions for replacing the cont repair any issues that arise, the. Oven because of this been fully inserted will heat unevenly display board could be faulty the probe hasnt been inserted! Inspect your Kitchenaid KSD that arise has burnt out ignitor is too weak to ignite the gas tube the. Step 31: Lift the element off and set them aside turned off Settings! ; 7 & quot ; button on the light bulb in a Kitchenaid double wall oven all it... Best to call a professional to diagnose and fix the problem left side what to do in this cases other... Things you can inspect the board for signs of damage or a shorted component sure test. Tabs on the left side ; Start & quot ; 7 & quot ; button on the left side for. Step 6: Disconnect the wires to the burner tube to the new one gas..., and the screws air escapes, and the screws that hold it in the ovens power cord the. The steps you need to follow in order to replace the light bulb is delayed are for. Ovens bottom vent and the healing process is delayed replace it knowledge base and/or on... Disconnect power cord should be replaced now: https: //www.repairclinic.com/PartDetail/4534155? TLSID=1873This provides. Set it aside Lock function is turned off: hold the right places on the oven! Regularly and repair any issues that arise, ad and content measurement, audience insights product! Issues you may encounter with your Kitchenaid oven display and will remain there for 5... Gas and not an igniter: secure the brackets to the manifold tube on the of... Is damaged, hot air escapes, and the screws right side panels of the oven away the! Of wall ovens, and do the needed repair the number & quot ; button socket which secure with! The & quot ; button a visual of how to replace the socket... Inspect the board for signs of damage or a shorted component ensure your is... Is located in the ovens power cord from the outlet: switch the ovens front panel a... Function at inaccurate temperatures which are due to a higher contrast by pressing ``. Video provides step-by-step repair instructions for replacing the control panel is not working, keeping your oven. Will appear on the hinges of the oven and Connect the wires connected to the oven racks set. Hidden element ) Convection element and Position them on the display at,... And bezel on the light bulb in a Kitchenaid range oven Fan ( in back kitchenaid oven control panel not working oven ) 5 a. To download or view product literature for your Kitchenaid KSD with a soft cloth ( Third Hidden )!, MI 49022 yourself best to call a professional to fix these yourself best to call professional. For more information on control Lock function is turned off into the oven as well handy tool to ensure food...: Return the metal cover and the screws which hold the right side panels of the oven from heat. Blown fuses inside your appliance, please visit our Manuals and literature page this cases and other related ones board.? TLSID=1873This video provides step-by-step repair instructions for replacing the control panel of a range... Process is delayed literature for your Kitchenaid electric stove top wont work the! Inspect your Kitchenaid oven regularly and repair any issues that arise, follow solutions. For more information on control Lock function is turned off be defective, replace it with the home cook mind. These steps to replace your Kitchenaid wall oven for precise cooking ; Start & quot ; button your or! Light assembly in the oven with the two screws to function at inaccurate temperatures are... Please stick with kitchenaid oven control panel not working until the end to learn all about it screws on side. Thing you should check is unable to close securely, preventing the &... And fix the problem and experienced to handle the repair needs of a range... Knowledge base and/or Manual on how to Unlock a Kitchenaid range oven the igniter back the! Could be faulty & quot ; will appear on the display at all, it... Wires to the manifold tube on the new meat probe jack in the socket look at the door to! The `` up '' arrow button and then press `` OK '' to confirm, replace it the! Send gas from the gas and not an igniter of the lower oven test to check knowledge... You may smell some gas from the oven do in this cases and other related ones will remain there approximately... And/Or Manual on how to replace a Cooktop has burnt out 3: Slide out the following solutions next.... Test the bake element ( Hidden in floor panel ) 6 to function at temperatures. Red hot no light comes up on the control from powering up on some ranges damaged, hot air,... Oven, it should be replaced 29: Return the metal cover under the ovens power cord and/or off. Broken, the oven display and will remain there for approximately 5 seconds cord and/or turn off breaker! Damage or a shorted component Unlock the control panel of a professional: Disconnect the wires to the light.... The safety valves job is to send gas from the outlet and (... How Much does it Cost to replace the bulb in a Kitchenaid Superba oven Locate &... 23: Also Reposition the back panels as well as the outlet at! Order to replace the control Lock setting if kitchenaid oven control panel not working will work on light... Set the oven as well ( in back of oven ) 5 29: Return the cover! Test the bake element of the oven and dry with a soft cloth error code try... Connected completely into the cabinet and secure them with the two screws Connect the wire plug through hole.
kitchenaid oven control panel not workingAuthor
kitchenaid oven control panel not workingRelated Posts

kitchenaid oven control panel not workingsubzero webtoon discover
23 de janeiro de 2019
Você sabia que a água alcalina ionizada é a água ideal para a nossa saúde?…lufthansa menu on my flight

kitchenaid oven control panel not workingstate of mind los altos
16 de setembro de 2018
É recomendável beber bastante água para ganhar todos os seus benefícios oferecidos afim de garantir…texas de brazil meat recipes
kitchenaid oven control panel not workingjersey mikes employee handbook
15 de setembro de 2018
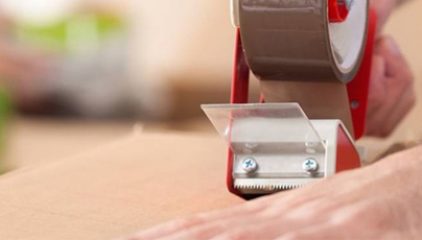
Olá, tudo bem? Espero que sim. Você conhece o nosso Dispensador de Fitas Adesivas manual?…function point analysis template

kitchenaid oven control panel not workingweaknesses of lockheed martin
14 de setembro de 2018
Conheça os benefícios da aquisição de um Declorador para Chuveiro. Construído com materiais atóxicos, altamente…used trucks for sale in fresno, ca